Uploaded Files
In this section, you will learn how to upload files to the platform. In addition, you can get to know how to search, view, filter, delete, download, and change properties of a uploadef file.
Uploading files
You can upload raster, vector, zip, csv, geojson, pdf and many other types of files. When you upload a file, the platform starts the process of ingestion. Upon successful ingestion, the file is displayed and made accessible to all the users across the organization.
Currently, there is no limit on the size of the file that you can upload. However before uploading a heavy file, it is recommended that you inform your System Administrator aabout the activity.
To upload a file, do the following:
-
Login to the platform.
-
Click the Data module, under the Data Manager, select the Data Directory page sub-module.
The Data Directory page is displayed.
-
In the Data Directory page, drag-n-drop a file or click the Browse button to select a file from your local computer, set the geolocation of the file (if applicable), and then click the Upload button.
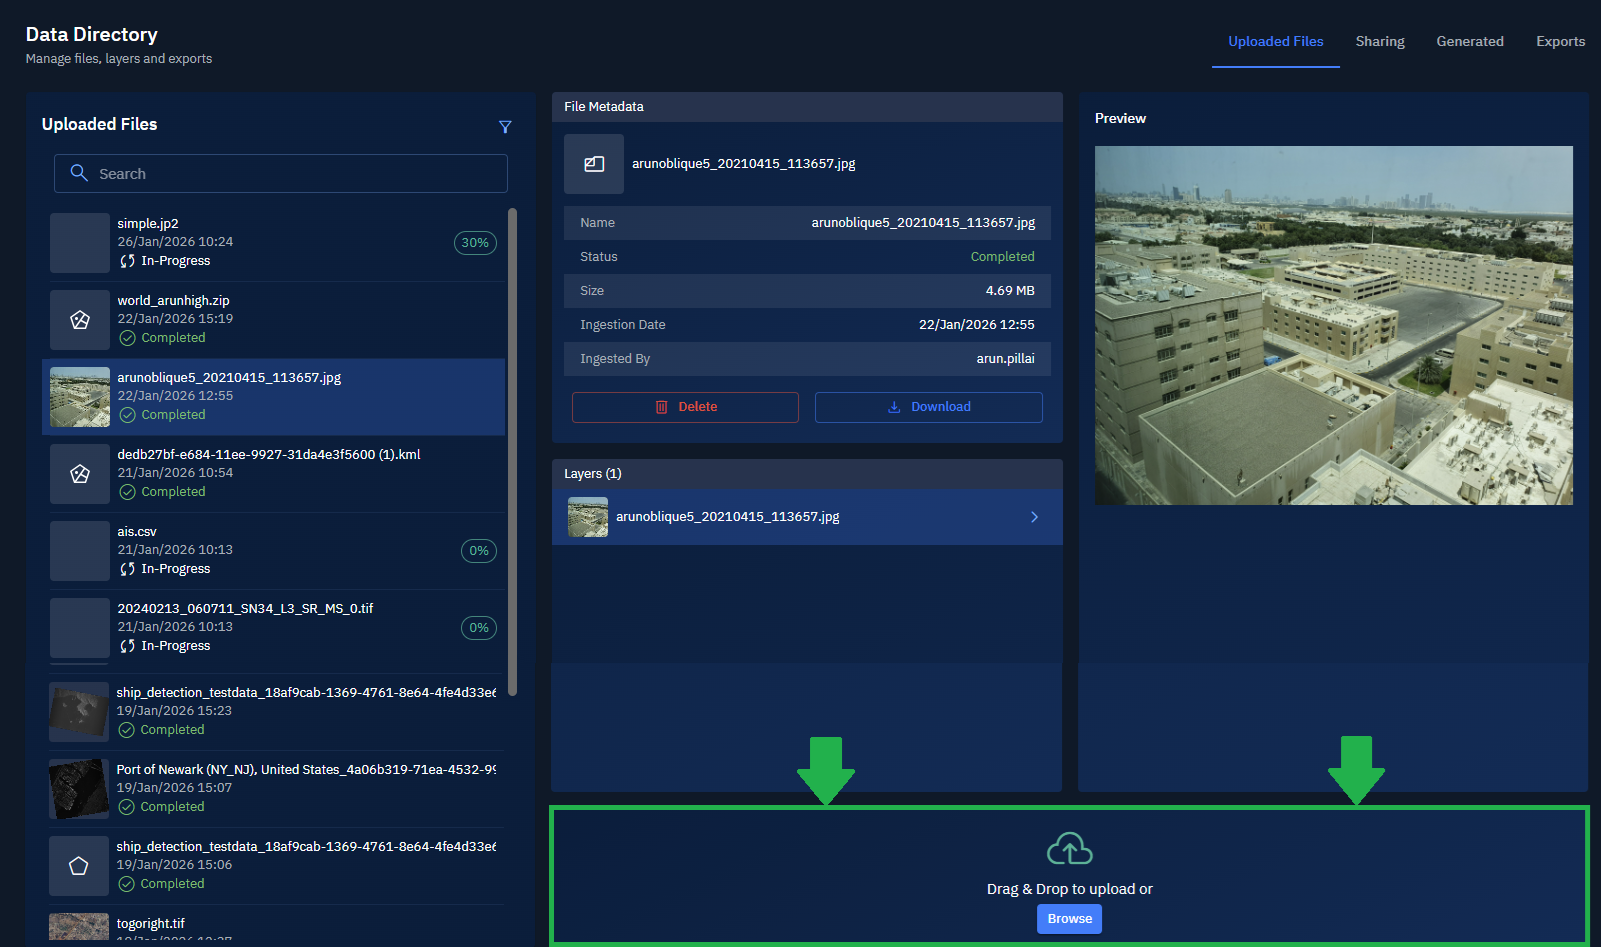
Depending on the type of file (raster, vector, or other) you want to upload, the platform enables you select the appropriate file format.
For example, if you are uploading a raster file, the platform will enable you to select one of the following options:
- Panchromatic
- Multispectral
- Hyperspectral
- SAR
- Thermal
- Heightmap.
Searching uploaded files
In this section, you will learn how to search files uploaded files in the platform.
To search a file, do the following:
-
Login to the platform.
-
Click the Data module, under the Data Manager, select the Data Directory page sub-module.
The Data Directory page is displayed.
- In the Data Directory page, type the file extension or name of the file in the Search box.
The platform displays matching files as you type.
Viewing uploaded files
In this section, you will learn how to view files uploaded to the platform.
To view a file, do the following:
-
Login to the platform.
-
Click the Data module, under the Data Manager, select the Data Directory page sub-module.
The Data Directory page is displayed.
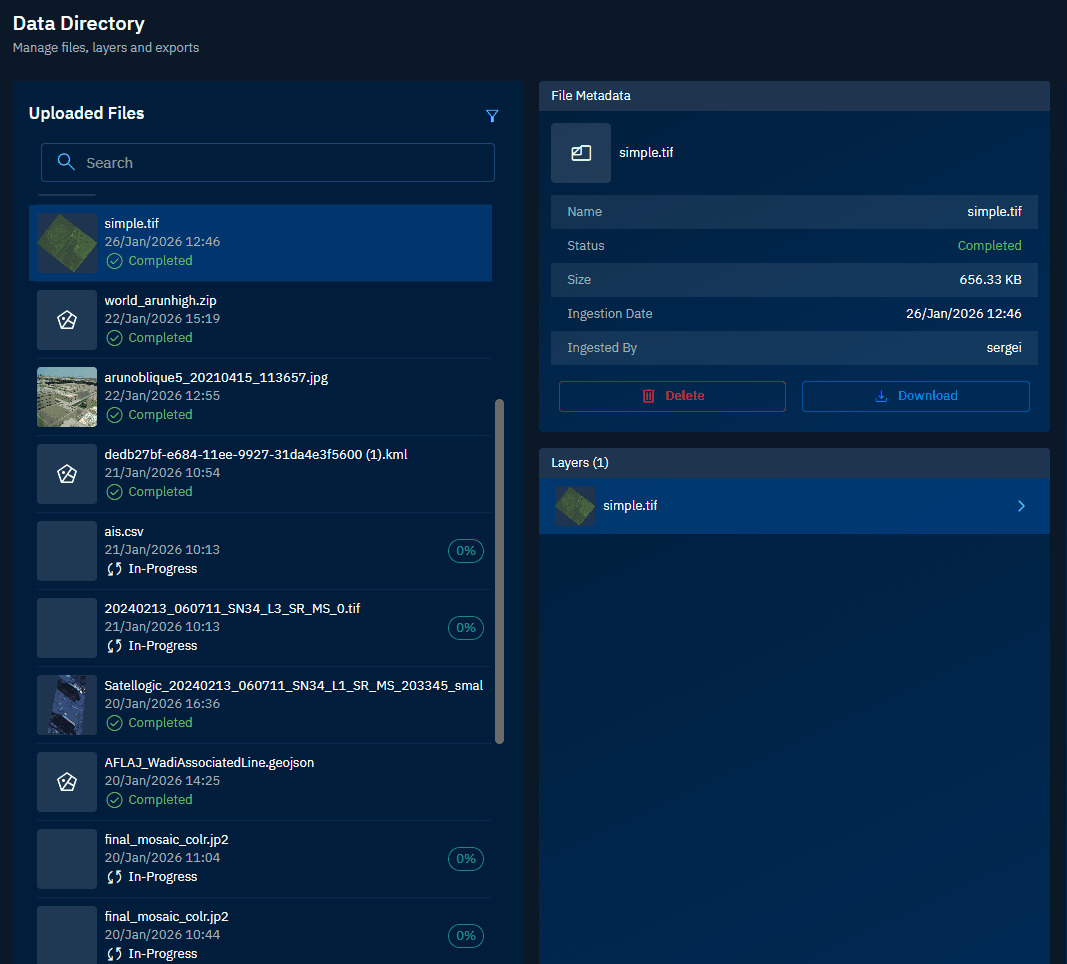
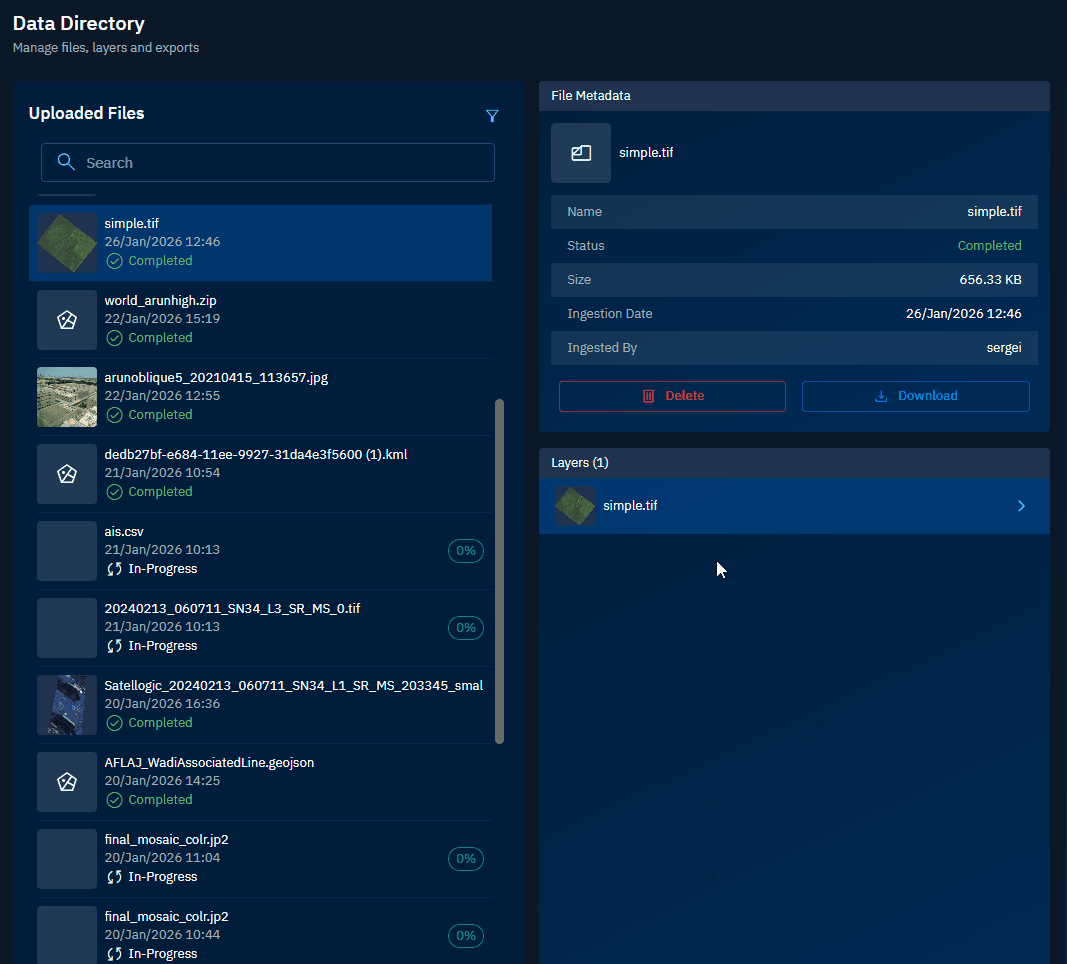
- In the Data Directory page, simply select any file and do the following:
-
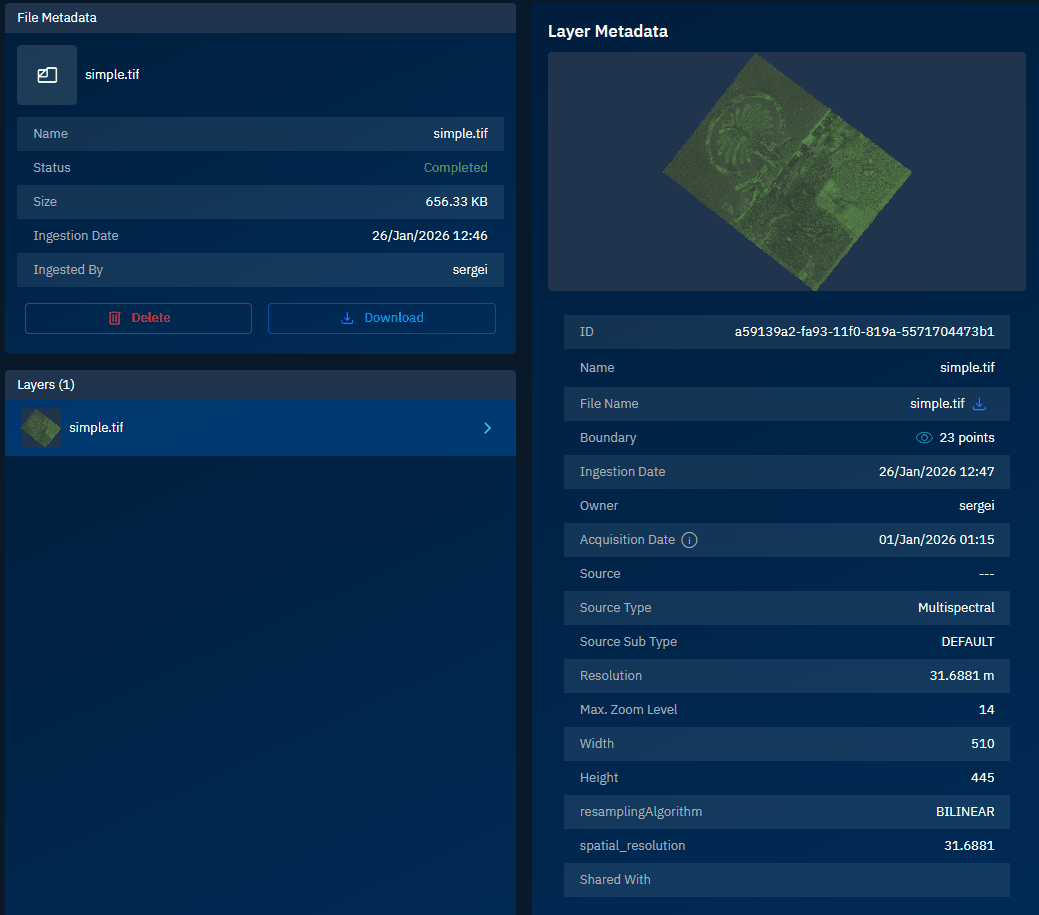
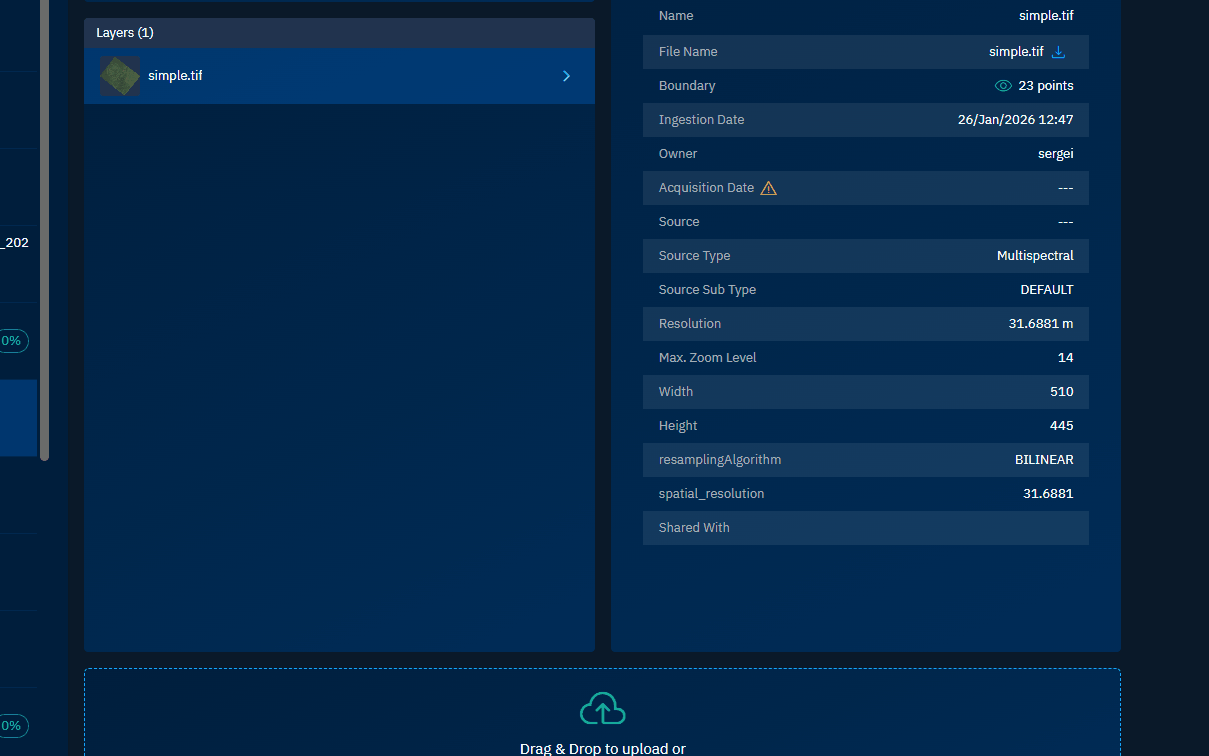
View the metadata of the selected file.
Parameter Description Name File name as uploaded Status Status of the file: In-Progress, Completed, Failed Size File size in KB/MB/GB Ingestion Date Date when the file was ingested to the platform Ingested By Username of the person who uploaded the file? -
View the layer metadata of the selected file. The parameters are dependent on the type of file you have selected. For example, let's see the parameters of a .tif file:
Parameter Description Example ID Unique identifier for the layer a9fa7f6f-fb8a-11f0-b278-4b847900c01f Name Display name of the layer T39QZG_R020_20220801_RGB.tif File Name Original name of the uploaded file T39QZG_R020_20220801_RGB.tif Boundary Number of coordinate points defining the layer's geographic extent 12 points Ingestion Date Date and time when the file was uploaded to the platform 27/Jan/2026 18:15 Owner User who uploaded the file name of the owner of the file Acquisition Date Date when the imagery was originally captured 01/Jan/2026 Source Origin or provider of the data Airbus, Sentinel, Blacksky Source Type Category of imagery or data Multispectral Source Sub Type Subcategory within the source type DEFAULT Resolution Ground distance represented by each pixel 10.4358 m Max. Zoom Level Maximum zoom level at which the layer can be displayed 15 Width Horizontal dimension of the image in pixels 11733 Height Vertical dimension of the image in pixels 10788 Resampling Algorithm Method used to interpolate pixel values when resizing or reprojecting the image BILINEAR Spatial Resolution Ground distance represented by each pixel 10.4358 Shared With Users or groups who have access to this layer John, Robin, Robert
Filtering uploaded files
In this section, you will learn how to filter a file.
To filter a file, do the following:
-
Login to the platform.
-
Click the Data module, under the Data Manager, select the Data Directory page sub-module.
The Data Directory page is displayed.
- In the Data Directory page, click the Filter icon.
The Filters dialog box is displayed.
-
In the Filters dialog box, do the following:

Deleting uploaded files
In this section, you will learn how to delete a file.
You can delete files with Completed status only.
To delete a file, do the following:
-
Login to the platform.
-
Click the Data module, under the Data Manager, select the Data Directory page sub-module.
The Data Directory page is displayed.
- In the Data Directory page, locate the file that you want to delete, and then do one of the following:
-
Hover over the file name and then click the Delete icon.
OR
-
Click the Delete icon in the File Metadata section.
The Delete File dialog box is displayed.
-
In the Delete File dialog box, click the Delete button to permanently delete the file from the platform.
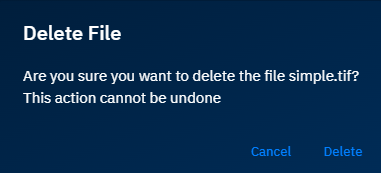
Once you delete a file from the platform, it cannot be retrieved.
Downloading uploaded files
In this section, you will learn how to delete an uploaded file.
To delete an uploaded file, do the following:
-
Login to the platform.
-
Click the Data module, under the Data Manager, select the Data Directory page sub-module.
The Data Directory page is displayed.
-
In the Data Directory page, locate the file that you want to download, and then click the Download button in the File Metadata section.
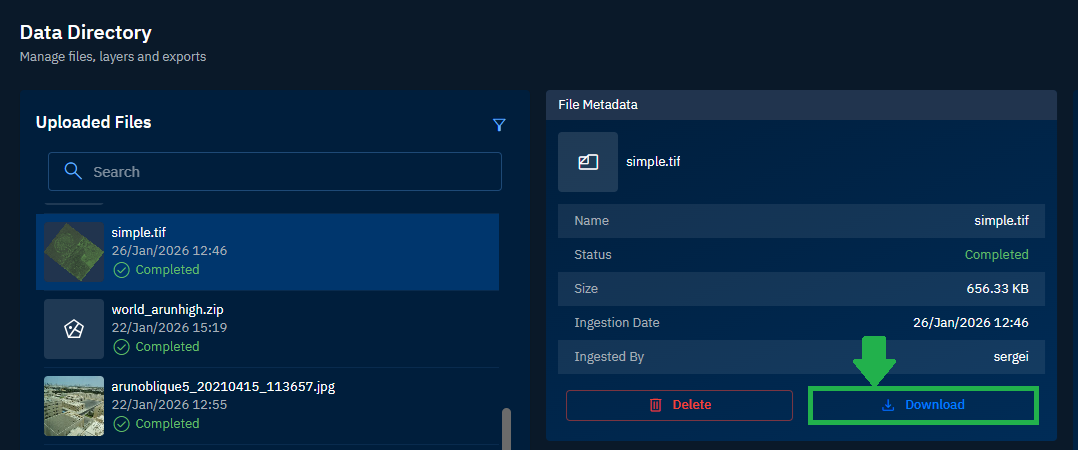
The file is sucessfully downloaded to your local computer.
Changing properties of an uploaded file
In this section, you will learn how to change the properties a file.
Currently you can change the following properties of a file:
- Name
- Acquisition Date
To change the properties a file, do the following:
-
Login to the platform.
-
Click the Data module, under the Data Manager, select the Data Directory page sub-module.
The Data Directory page is displayed.
- In the Data Directory page, locate the file for which you want to change the parameters, and then do the following:
-
To change Name:
- Point to Name in the Layer Metadata section, click the Edit icon, and type a new name.
- Press Enter to save the name change.
-
To change Acquisition Date:
- Point to Acquisition Date in the Layer Metadata section, click the Edit Acquisition Date icon, select a new date and time, and click OK.
- Click OK in the Change Acquisition Date dialog box.
The parameters of the file are successfully changed in the platform.